This post is going to be a little different then my normal posts. I have been trying not to say much about it, but now I feel like I can. Up until yesterday it was illegal for home bakers like myself to make things in their home kitchens and sell them. I was not aware of this when I started this adventure last summer. A few friends informed me and let me now of a group called the Texas Baker's Bill. Their sole job was to help get a bill passed into law that would allow us home bakers to do the one thing we loved doing.... baking and make some money from it. When I first joined the group several months ago, there were actually two bills trying to make it through the process. One of them never it out of committee to come up for a vote. The second made it further. It did make to the floor for a vote and was passed. After that it went to committee that regulates the Health Department. Unfortunately, the bill died there because of one city.... Houston. It seemed that in this case money seemed to talk more then the best interest of the people. All was thought to be lost until Rep. Lois Kolhorst added an amendment to SB 81 on May 24th, 2011. This gave us hope again. There were some hurdles still over come, but this time around there seemed to much more open support. The amendment was approved and the bill was passed on to its final vote. That final vote came on May 28th, 2011. Then both the House and Senate signed the bill on May 29th allowing the bill to be put in front of the governor on May 29th. Now the waiting begun. Three things could happen.... One: the governor could sign the bill.... Two: the governor could veto the bill..... Third: the governor do nothing and the bill would automatically become law on June 19th, 2011. Of course our main concern was that he not veto the bill. I will admit for a person who studied politics and history in college, I never became very involved in the political process, but this time I did. I wrote letter to the governor and actually called him also. I want to believe my voice made a difference because on June 18th, 2011, Governor Rick Perry signed SB 81 into law. Now all of those home bakers that have not been baking in their home kitchens (cough cough) can officially start on September 1st, 2011. YAY!!!!!!!!!!!
I would like to thank everyone out there who has supported me and others like myself in our struggle. I hope you continue that support and keep buying those HOME-baked goodies.
Until next time....... Happy Baking!
Saturday, June 18, 2011
Thursday, June 16, 2011
Graduation Cakes
I was lucky enough in the last two weeks to be able to make two graduation cakes for a wonderful person. The first one I told you a little about before. It was the newspaper design that I came up with. The graduation girl loved it and even asked if I was making the cake for her party that was on a later date. So, that is where Cake #2 comes in. First here is the Newspaper Cake:


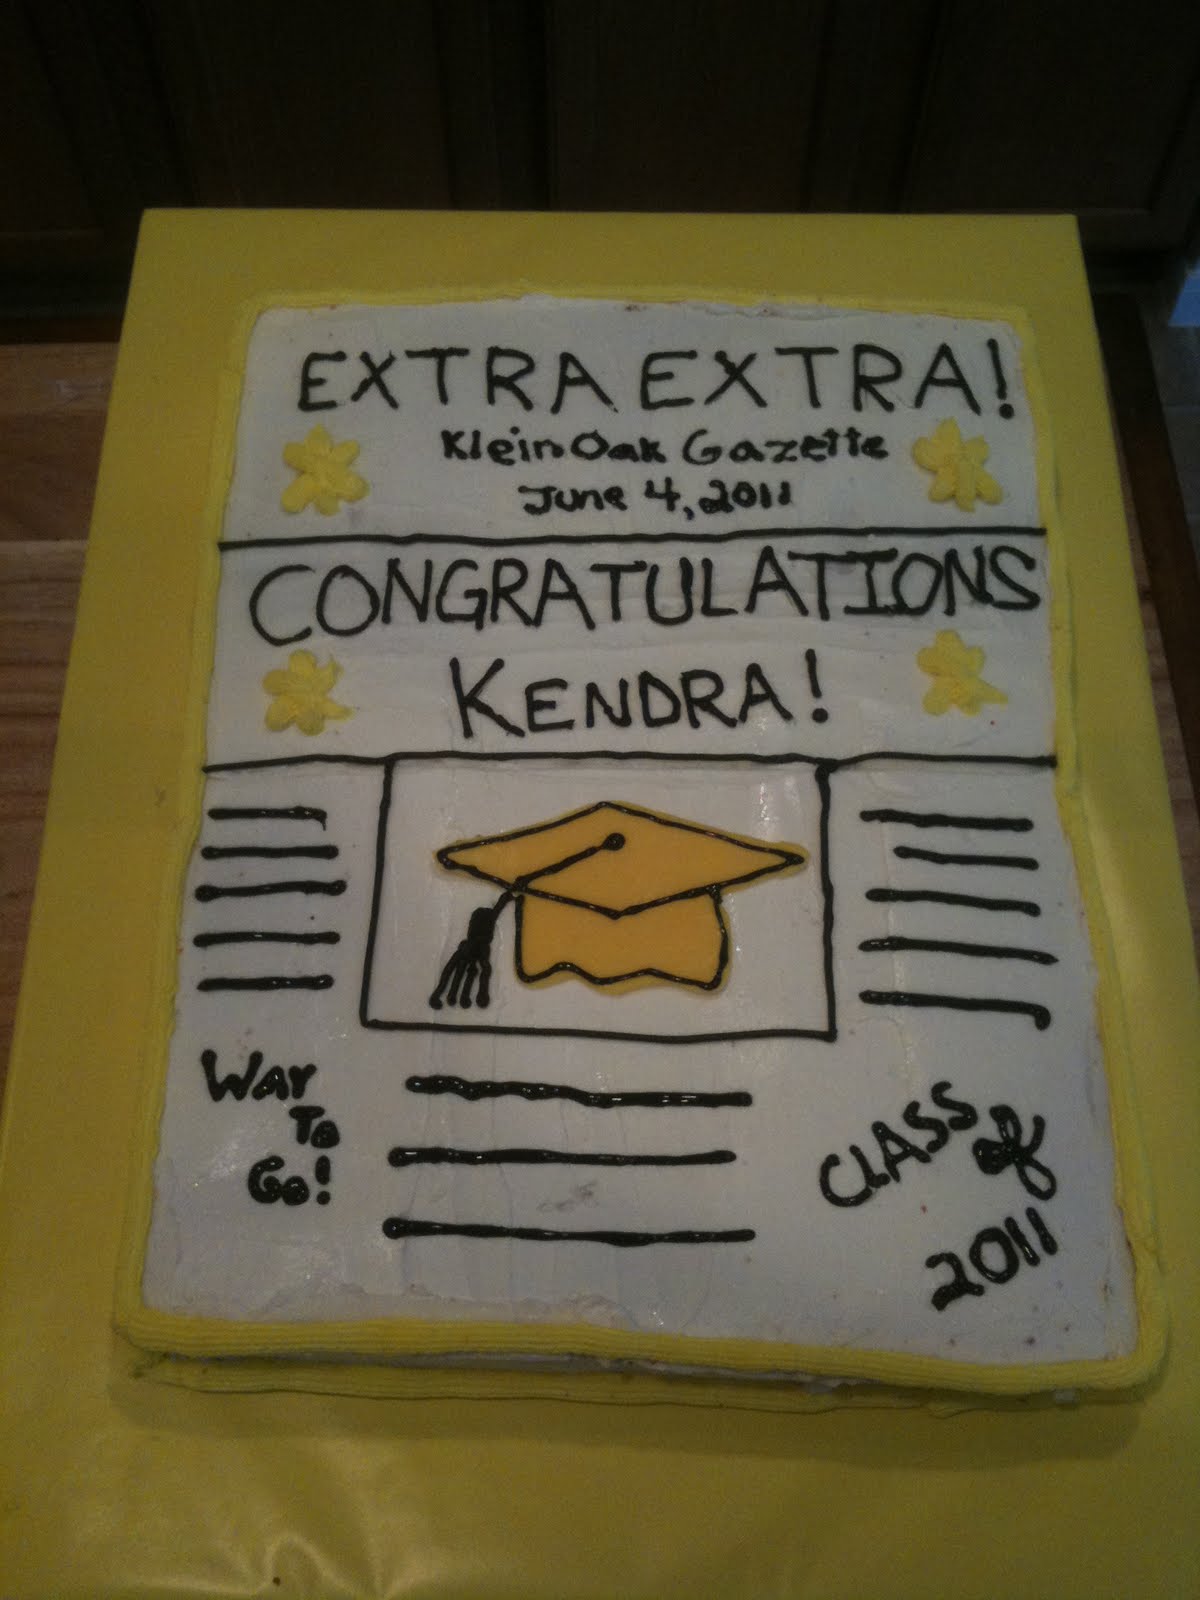
It is a red velvet cake with buttercream icing.
This cake was actually very fun to make, except for the red food coloring. (Anyone who has worked with red food coloring in anything should know what I mean.) It was very exciting to see what I had sketched on paper come to life. All the decorations on the cake are done in icing except for the graduation cap which was done in yellow chocolate.
The second cake was much simpler. It only needed to half the size of the first one and didn't need to red velvet.... (thank god!) Did I mention, red food coloring and I are not getting along at the moment? Anyway here is the second cake....

This is a Vanilla White Cake with buttercream icing.
As you can see this is a much simpler cake then the first. Just like the first one, I made the cap and diploma of out white chocolate. To make the cap black while the chocolate was still melted I covered it in black sugar crystals. I also got play a new toy that I bought. It was the letters. I know my writing is not the greatest, so I knew I needed some help in that department. I bought a letter press. I am able to create any word with the letters and then just press them into the icing. Then use the impressions as a guide to your writing. I think I did pretty well, if I say so myself. I can't wait to try it out again.
My next big project will be for my daughter's 4th birthday. I still have several ideas running around in my head, so I can't really tell you much yet. But, I promise I will tell and show you all.
Until next time....... Happy Baking!
Sunday, June 12, 2011
Snoopy Cake
All went well with the Snoopy Cake for the most part. After two different cakes and two different icings, it was finally made. Here is the finished product:


The cake was a vanilla white with buttercream icing.
I know you must be wondering what happened. Well, I like to think you are wondering what happened. Even if you aren't I am going to tell you anyway. I ended up making two cakes and two different icings.
The first cake came together very well and baked with no problem. So, I didn't think much of it. Well, even the best bakers have goofs. I turned the cake out of the pan to finish cooling on the rack. Let's just say half the cake didn't want to leave its warm home of the pan. The cake tasted great, it just wasn't in one piece. So, my daughter's teachers got vanilla cake pops dipped in milk chocolate as an end of the year thank you gift. Hey, I couldn't let a good cake go to waste. Back to the mixer I went. The second cake was nice and came out its home. So, I am thinking.... Phew, all good..... WRONG!
I thought I would make a whipped icing instead of my normal buttercream because I wanted Snoopy to be a brighter white. Stupid me.... I need to learn to stay with I do best. For whatever reason, the whipped icing did not want to set up right nor no matter how much sweet I added to it, it never tasted right. Needless to say, I ended up making my buttercream icing instead.
In the end all was good and Snoopy went to a good home. He was loved by all.
As a small side note I did start writing this entry on May 30. Sorry I got a little side tracked with another cake I was making and forgot to finish. But, it is here now. And very soon I will have two cakes to write about.
Until next time....... Happy Baking!
Thursday, May 26, 2011
Things are looking good!
I recently had many good things happen to me in just last few days. About 3 months ago some of you may remember I made a Transformer birthday for someone I worked with. At the time I was hoping for some big things to happen, but not much did. Little did I know that the proverbial ball did start rolling it just took to now to catch me.
I had another co-worker ask me to make her daughter's graduation cake. This time it is completely my own design. She needed a relativity large cake. So, I came up with the idea of making in look like the front page of a newspaper. It will have headlines and pictures. Don't worry I will post the pictures after it is made. So, you will just have to wait until then. The downside in this whole thing was I had never baked a cake that big before. I had a pan that was perfect. I would just need to bake two and then put them together. No big deal right? Wrong! Your standard one batch of cake mix is not enough. Lucky for me I have a husband whom always thinks of the smallest details before doing anything says to me, "Well sweetie, why don't just make a trial run just to see what you need?" D'oh! Why didn't I think of that. Silly me. I guess that is why I am the talent and he runs the business side. So, any way last weekend I made the trial run of the red velvet cake. I found out exactly what I needed and how long to bake it. It came out great. But now..... I have this 9 x 15 x 2 size cake with no where to really take it. Then the light bulb went off. (Yes, I actually do see light bulbs and yes I know I am crazy.) Cake Pops! I ended up making 25 red velvet cake pops dipped in white chocolate.
I took the pops to work on Sunday. Everyone who had one LOVED them. But, this is the best part....... the co-worker whom I had to do this for looks at them as says, "Hey, do you think you could 50 of this for me for another party I am having?" In the back of my head I am jumping up and done going "YES! YES! YES!", but I calmly say, "Of course I can. When do you need them?" So, I will be making Cake Pops again in about 3 weeks. Can't wait it is going to be so much fun.
But, wait there is more.....
I will be making a cake in the shape of Snoopy for this weekend coming up. I asked to do this by another co-worker who had one of my pops. I am really looking forward to making this cake since Snoopy is one of my favorite characters. I also have the potential for two more cake orders and another order of the Cake Pops. I'll let you know how those go.
So, as you can see it may not be a very big ball, but it seems to be getting bigger and moving a faster. Let's keep our fingers cross that it just doesn't run me over.
Until next time....... Happy Baking!
Monday, May 9, 2011
Updates
I have recently had a few things happen in my life that has kept we away from doing two of my favorite things..... baking and blogging. I THINK my life has settled down a bit...well as much as it can being the mother of a three year old, a wife, and a part-time employee at major retailer. I know it doesn't sound like a lot, but I did let it get the better of me for a bit.
I did have two things happen in my baking world since last time. I made cupcakes for a teenagers birthday this past weekend and I have an order for a graduation cake in June.
The cupcakes were a big hit. The only down side was there wasn't enough. The mom didn't expect as many as she did, so 2 dozen cupcakes went really fast. Here is the final result:

They were half and half..yellow and chocolate with buttercream icing.
The graduation cake will be a red velvet cake and will be shaped like the front page of a newspaper. I am going to decorated it with a graduation cap and the school mascot. I plan on making them out of chocolate, so they will be edible. I will post pictures of the completed product.
I will also have my daughter's birthday cake to do at the end of the month. This year I need to be a little more creative. She picked Clubhouse Mickey as her theme. There is only one Mickey Mouse shaped cake pan that I could find and as cute as it is I want more for her. So, I will need to brainstorm and out sketch out a few things. I am a little worried I won't come up with something, but I can just here my friends all saying...."You know will think of something and it will be great." I just hope so. I am open to suggestions.
Last thing is this. I was thinking of doing a little more with the blog itself. It of course will still be baking and my baking adventures, but I was thinking of expanding it and possibly talking other things too. Such as tips and links to other things I find on the web. What do you think? Please be honest with me and tell me I am insane. Don't worry I can handle it.... I think.
Well, until next time....... Happy Baking!
Sunday, March 27, 2011
Microphone Cupcakes
Over the last few weeks I have been seeing an increase of people finding my blog because of the microphone cupcakes I made. Most of the people searching were looking for how to make them, so I was thinking I would make a quick post on how I actually made them.
Some of you may remember back in January I made microphone cupcakes for a 5 years old Justin Bieber themed birthday party. Even though they were used for a children's party they could really be used for any music themed party.
Here is what I did:
First, use your favorite cake (it can be from a box,I promise I won't tell) and just follow in the directions to make cupcakes.
Second, you can make your own frosting or use one from the can. Which ever you use might I suggest that you do not use a whipped frosting because you need a frosting that will harden a bit to hold the sprinkles on. If you make you own, you of course can tinted it any color you want. If you use the frosting from a can you have two options. One, if you plan on using chocolate sprinkles and don't want to tint the frosting, you can use plain chocolate frosting. But, if you are a little adventurous and want some color then use vanilla frosting and tint it any color you want.
After the cupcakes cool, it is time for assembly. This is where I learned a bit from trial and error. So, hopefully by me telling you my mistakes it will help you not make them. My biggest issue was finding a way to store and transport them. Lucky for me I have a husband who is handy with wood and he made me a wooden box type thing to help me carry the cupcakes. Hopefully, you won't be needing to take them anywhere and don't need anything like that. So, if you just need to store them until party time, might I suggest cutting holes in a cake board, picture what vendors use to carry around the cotton candy at places.
Ok, for the actually assembly of the microphones, I use plain old sugar wafer ice cream cones. I happened to use the multi-colored ones, but of course you can use just the plain ones. First thing I did was put some M & Ms in the bottom of each cone. This helps with the balance of the cone since the finished product will be top-heavy. You could use whatever candy you like. I think it also gives an extra little treat.
First, you need to put a little frosting on the inside of the cone to help hold the cupcake in place. Place the cupcake in the cone and then finish frosting. You want to make sure the cupcake is covered, but not too much. After they are frosted, I just poured the sprinkles over the cone letting the sprinkles just stick to the frosting. I happened to do each cone from beginning to end, you may choose to do it like an assembly line that is completely up to you.
In the end your result should resemble this:

I hope this helps some of you out there in making your own microphone cupcakes.
Until next time...... Happy Baking!
Monday, February 28, 2011
Transformer Birthday Cake!
I was lucky enough to make a special little boy his birthday cake. He wanted a Transformer cake. So, I got to buy a new toy, a Transformer shaped cake pan. Here is the final product:


The cake was a white cake with buttercream icing. The entire cake was done with a No. 3 star tip.
I was told by the mother that the boy was very happy and thought it was very cool. She also informed me that every one kept asking her where she got the cake, so she was great PR for me that day and handed out my business cards to everyone. Keep you fingers crossed for me that I start getting more orders.
I also found out today that the Italian Cream Cake were also a big hit. One woman said she loved it and she doesn't really care Italian Cream Cake. I was very happy to hear this since this was my first time making it.
Until next time....... Happy Baking!
Subscribe to:
Posts (Atom)